Video Guide
Getting Started
When you first create an experience, you will be directed to the below offer configuration screen to begin with:

In most experiences, a Winner and Loser offer is created by default for you to begin customising but if you require more prizes you can hit the 'Add another offer' button.
Basic Configuration
Click the edit icon (pencil) on the offer listing to begin configuring your offer.
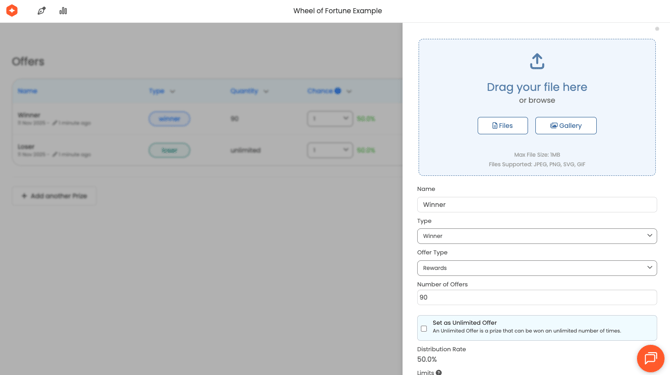
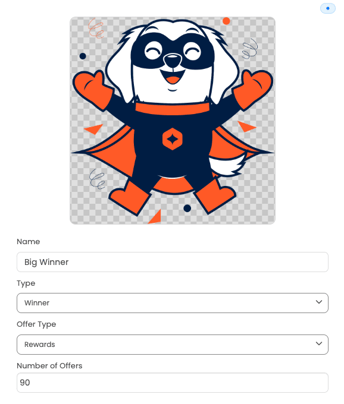
The first things to do are to name your offer and add an image to use. Both of these will be used to auto-populate success a success frame for the offer. You should also set whether the Category is 'Winner' or 'Loser'
If you wish, all offers can be winners except in the case of a knowledge quiz which requires both a 'Winner' and a 'Loser' offer category to function
You're now ready to start configuring your Offer Type.
Offer Types
You may choose between 'Rewards' or 'Vouchers'. Rewards should be used when unique voucher codes are not needed. For example, when giving away a generic code or just a content based offer.
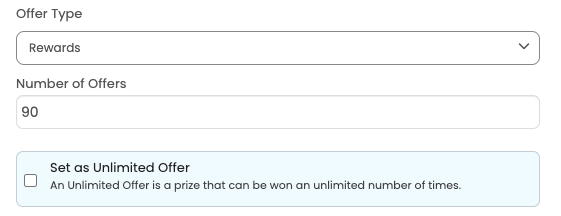
Offers can be set to be restricted to a predetermined quantity or set as unlimited.
At least one 'Unlimited Offer' must be available in each experience in order to publish it. This ensures there is always an offer to show your customers even when the limited offers have been exhausted.
Vouchers can be used when you wish to retain more control over voucher usage. You can either upload a list manually or connect to a Voucher API (currently Shopify and Magento are supported).

Voucher import files must be in a CSV format and should contain a single un-headed column containing a single voucher code on each row.
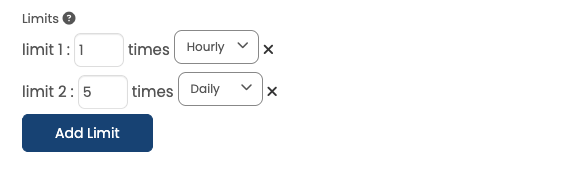
Offer Limits
Offers can be limited both by time periods or by locations.
Time limits can be set for each hour, day and week to ensure you throttle the flow of important offers.
If you are asking a customer to define their store location, you can also limit prizes based on the location selected. For example, allocating a split of prizes across locations or setting locations where the offer is not available to zero. For more details see here.
Advanced Configuration Options
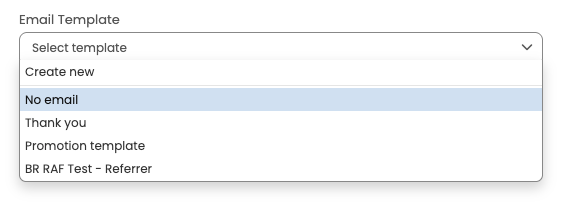
Email Template: If you'd like to trigger an email via Odici's integrated ESP, you can select from your pre-built email templates. Guidance on building these can be found here.
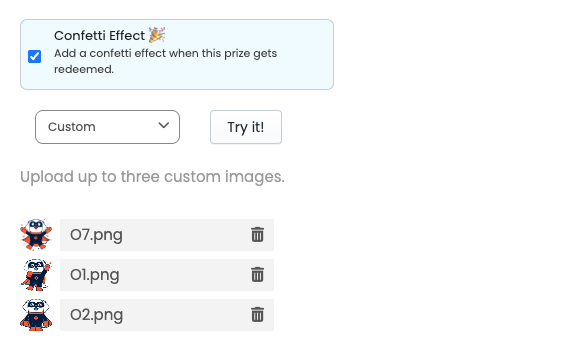
Confetti: This can add a bit of theatre to your offer reveals. You can add choose from our pre-set confetti options or upload up to 3 of your own image to show.
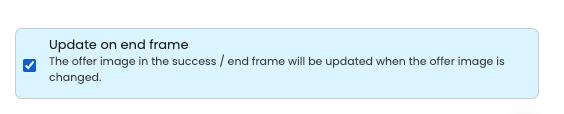
Update on end frame: Leave this enabled if you want any changes to your offer name or image to automatically update your success frame. Untick if you'd like to use a different offer name and offer image on your success frame.