Overview
Odicci Webhooks remove the need for manual CSV exports or custom integrations. With Webhooks, the moment a user completes your Odicci experience, their data is automatically pushed to the tools your team uses every day (whether that’s your CRM, email platform, loyalty program, or a data warehouse).
If your destination tool can accept incoming data, Odicci can connect to it in real-time.
Key Features
-
Universal Connectivity: Push your campaign data to any platform that accepts incoming webhook data.
-
Granular Data Control: Every field from your experience (emails, names, scores, opt-ins, timestamps) is available as a merge field. Simply drag and drop the exact data points you need to send.
-
Multiple Connections: Need to send data to your CRM and your email marketing tool simultaneously? You can add multiple webhooks to a single experience so they fire at the same time.
-
Reusable Templates: Once you configure and test a webhook, you can save it as a template. Apply it to future campaigns with a single click, completely bypassing the setup and testing phases.
Step-by-Step Guide
You do not need to be a developer to configure Odicci Webhooks. Follow these steps to get your data flowing automatically:
Step 1: Obtain Your Destination Details
First, determine where you want your data to go. You will need two pieces of information from your destination platform:
-
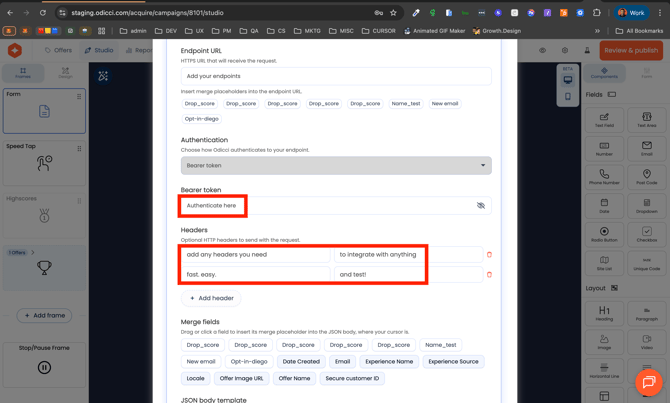
The Endpoint URL
-
Authentication Credentials / Headers
Note: If you are unsure where to find these, ask an admin for the destination tool (IT, your development team, or the vendor's support team). This is typically a quick, 5-minute task.
Step 2: Create the Webhook in Odicci
-
Navigate to the Webhooks section within your Odicci campaign setup.
-
Give your new webhook connection a descriptive name (e.g., "HubSpot Lead Sync").
-
Paste the Endpoint URL you retrieved in Step 1.

-
Input any necessary Authentication details and Custom Headers required by your destination tool.
Step 3: Map Your Data
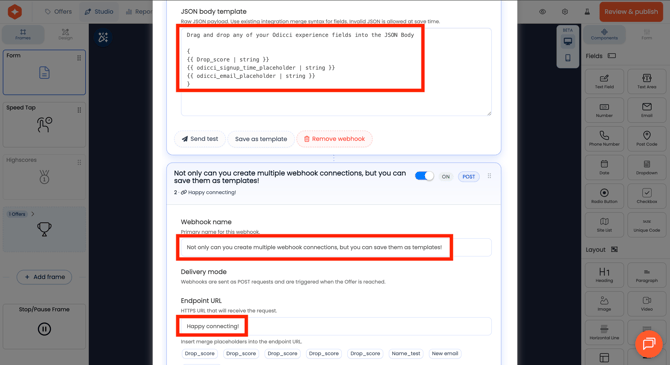
Odicci makes formatting your JSON payload easy with a drag-and-drop interface.
-
Open the JSON body editor.
-
Locate your available experience fields (e.g., First Name, Email, Score).
-
Drag the required merge fields directly into your payload structure.
Step 4: Test the Connection
Before making your campaign live, verify that the data is formatting correctly.
-
Click the Send Test button.
-
Check your destination platform to confirm the test data arrived exactly as expected.
Step 5: Save as a Template
Once your webhook is successfully tested and working:
-
Save the connection as a Template.
-
For all future campaigns, simply select this template to instantly apply your configuration without needing to rebuild or re-test it.
Need Help?
If the data formatting or JSON payloads feel unfamiliar, our team is here to help you get connected.
Reach out to our Customer Success team. We will gladly help you:
-
Connect to the tool of your choice.
-
Format the data exactly how your destination system expects it.
-
Test the connection end-to-end.
-
Save it as a reusable template so you never have to configure it again.